
Plastering a wall is often an operation that most people will leave to the experts, especially those people who are Concerned about suboptimal outcomes with their DIY job. Thus, if you are not an expert, you might not know what the best practice is to plaster a wall. Therefore, there is extensive knowledge required about this process and the products.
Obviously, many people aim to avoid surface imperfections that stick out and annoy for years. Therefore, to prevent that, we have put the best guide for you to follow and learn about how to plaster a wall correctly and flawlessly. In this section, we’ll provide you with some handy practical recommendations added along the way!
What plaster to use?
The use of plaster on wall is browning and bonding. Both of them are viable options for use in the walls. They have a broad applicability of walls and structural elements that are suitable for any use. To ensure you know which kind of plastering you need to use, we are going to go in-depth to help you identify what you need.
It serves as a versatile construction material that is employed for wall finishing applications and ceilings. Thus, providing a layer of protection that can be painted. It is usually made of a blend of gypsum powder and water. After that, you apply it to walls and ceilings in a uniform, smooth layer. Essentially, it is a type of coating that you can employ to cover internal walls and ceilings for protection against the elements or simply for decorative purposes. The mixture used for exterior walls is usually referred to as render.
They are typically applied in two coats. First, a base coat and then a skim coat. The base coat serves to even out the wall and remove any holes and cracks. The skim coat creates a smooth finish for a good-looking and clean look to the walls or roof. Now let's proceed to the adding plaster procedural steps.
Materials and tools needed
If you are wondering about the tools and kit that you might need to get you started on how to plaster the wall. We are starting on all the required equipment and materials for this process. It's best to prepare well in advance to avoid running back and forth to the shop in search of the tools you need. Thus, leaving the job unfinished and having undesirable outcomes. Therefore, it would be useful for you to have the following items:
- Plasterer’s trowel and bucket trowel
- Plasterers Float
- Corner trowel
- Hawk
- Bucket x2
- Mixing stick or paddle
- Plaster
- Clean Water
- Sandpaper
- Stepladder or stilts
- Flat Mask
Preparation to plaster
This step is all about putting the foundation for your plaster work. If you don't have a good foundation, you won't have good results. First of all, what you want to execute is to lay protective sheeting to ensure that your work area is clean and to prevent any spillage. You can use a cheap canvas or any old newspaper or even old clothes/rags for this.
Secondly, you need to eliminate residual material/debris and existing stuff, dust or wallpaper and assess the substrate porosity of your wall to make sure it is not too wet or porous. If this is the case, it will suck out all the moisture out of the wall and plaster. Hence, it won't have a chance to work before it dries. Therefore, you can control it with water or PVA. This way should be enough to ensure that it won't dry too quickly.
A handy tip when wetting your walls is to employ a fine mist spray gun to avoid having to keep reaching down to re-moisten the applicator. Once the water starts running down the wall, you know you’ve controlled the suction. Properly prepare low‑suction backgrounds, such as painted surfaces, by applying a mix of PVA glue and water to ensure the material sticks to the wall.
Putting PVA on the walls
The PVA glue is used to hold the material onto the walls as well as to help it dry evenly. There are some considerations to think about when diluting the PVA glue. Make sure it is a 4:1 ratio - one part PVA and four parts water. The mix should be ready to be rolled or brushed onto the walls.
When applying plaster to a wall, it's crucial to use PVA (polyvinyl acetate), which helps it adhere properly. Apply the PVA and wait until it becomes tacky, not fully dry, before you begin plastering. If you apply it too soon or too late, it won't bond correctly, leading to poor results and possible future cracking.
Mix plaster
This part is all about how to mix it properly and effectively. However, first of all, before you perform anything, make sure that you are wearing a dust mask before opening the bags. As the Airborne particulate matter will be everywhere. Thus, if you are not in a well-fumigated room, it can irritate your nose and breathing.
Then you need to fill a bucket that can hold around 5-7 gallons. Which then you fill halfway with water, then add the plaster until a mound is created on the surface of the water. Straight after this, use a stirring tool to help mix the dry mix. You need to stir until it achieves a smooth, homogeneous consistency. Another thing is you need to ensure that you are adding the mix into the water, never the other way around.
Applying the first coat of plaster
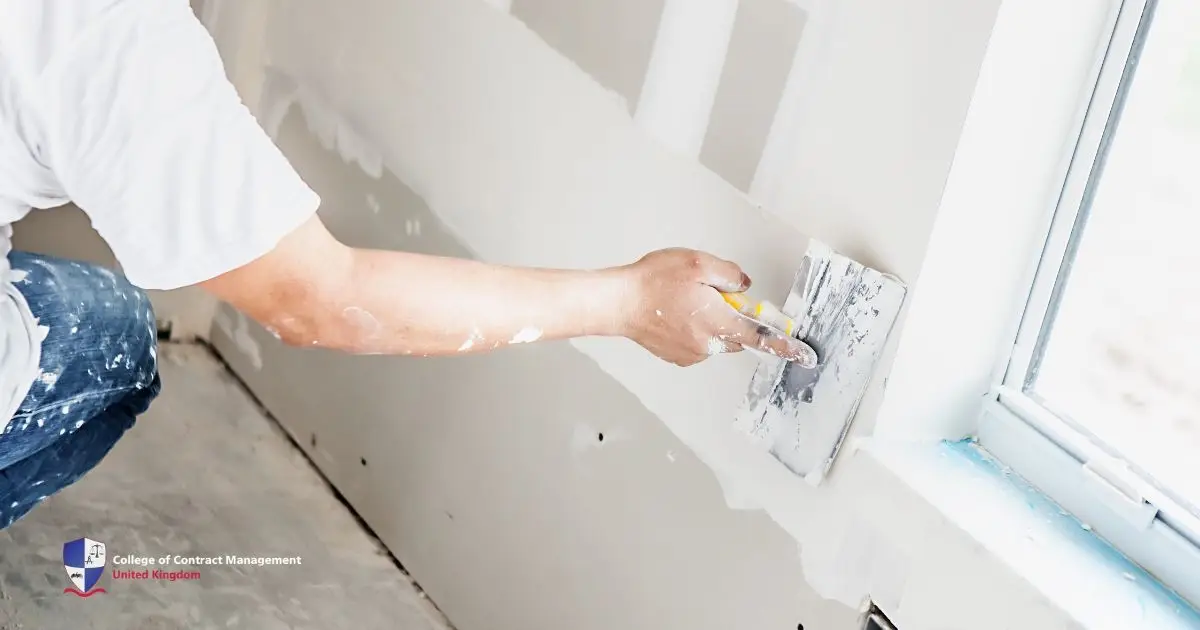
Now, onto the important part, which is the application. Using the hawk, float and trowel, your job is to put the first coat of plaster onto the edge of your trowel and scrape it onto your hawk. It shouldn't stick to the hawk; however, if it does, you can just wet it slightly to moisten it. Now, starting from the bottom left corner, working your way upwards, apply a conservative amount of it from your hawk onto the wall uniformly.
When starting from the bottom left, you can just crouch down and push the material up the wall in a gentle arc-like motion. At the top of your stroke, you should be fully standing. Slide the trowel around two to three inches to the side and then reverse the motion and bring it down again.
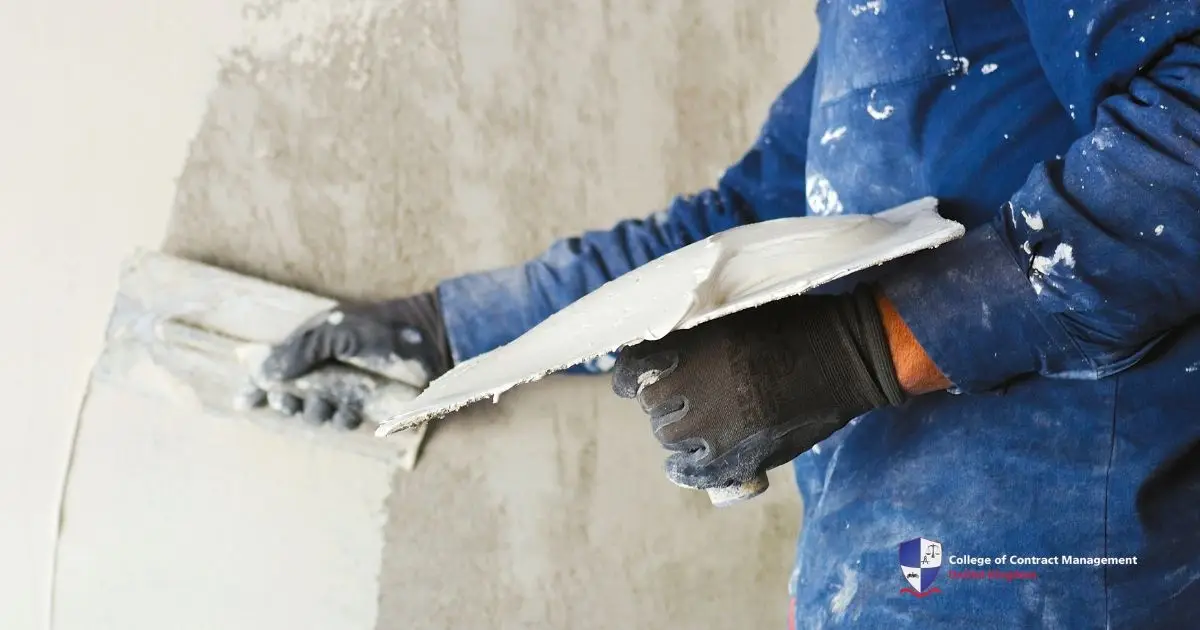
Smoothing and adding the second coat of plaster.
The drying time would take about 20 min for it to dry a bit. At this point, you will probably find small and localised protrusions or inconsistencies spread across your wall. You can use a trowel to gently level and refine surface irregularities, especially around the corners at the bottom and the top of the wall.
Afterwards, the second layer needs to be of a thinner consistency than the first. Next, dilute your plaster mixture with more water. Make sure you mix it and follow the same procedure when mixing to ensure a properly mixed compound. The goal here is to only apply a 2mm layer of the material. Finally, you can leave it to dry afterwards.
Polishing up the details
Once the plaster has dried slightly, you will have a fully plastered wall that only requires a little bit of polishing work to ensure it looks perfect. You can execute this by adding water to the surface with a spray gun or a wet brush. Make sure you spray the edges with it. Next, ensure that you are using the trowel to help smooth out the surface. Then you can use a wet brush to fill out those edges.
Keep in mind that, as you finish, the float pulls it from the wall’s high spots down to the lower areas. You can always apply additional material where needed or wipe any surplus from the float onto your hawk. The main thing when plastering a wall is to remember to work through all of the different stages. Execute each phase sequentially and bear in mind that it gets easier as the setting process begins to happen. If you have done this, it should minimise the amount of sanding needed once the wall has dried and enhance time efficiency.
Conclusion
By preparing the surface, choosing the right plaster and mixing it correctly is the key. Applying a solid base coat, followed by a refined skim coat, and smoothing as it sets; you can achieve a flawless finish. Attention to each stage leads to reduced sanding and touch-ups, ensuring professional walls stand the test of time.
If you are someone who wants to master how to construct and expand your career in construction, then you should consider joining the College of Contract Management. They specifically specialise in providing high-quality and flexible online training courses in fields such as construction and project management. If you're ready to start a better future and embark on this new learning journey, now is the time to enrol with the CCM. Take the first step towards shaping your future with high-quality and up-to-date learning resources.